Graphiste, vidéaste et photographe, il façonne des visuels qui racontent bien plus qu’ils ne montrent.
30 June 2022
Filming is natural for some people, but it is not so obvious. To obtain a quality shot requires the respect of certain cinematographic rules and the knowledge of certain technical aspects.
De manière générale, la vidéo et la photo utilisent des techniques semblables, voire identiques. Dans cet article , découvre quelques règles clés sur les différentes prises de vue en vidéo !
Table of contents
1. Tips for making videos like a pro
#1 Make sure you have a good image composition
Respect the rule of thirds for a perfect image composition
#2 Prefer wide shots
In fact, filming your shots slightly wider will allow you to correct the framing afterwards, which can save you some hassle later.
#3 Use 2 cameras
In an interview, use at least two shots, one wide and one tight, to achieve a dynamic edit. This applies to other types of video but is necessary for a more static shot.
#4 Choose your actors carefully!
Indeed, you can make the best shots in the world, if the acting does not follow the result will inevitably be below your expectations. So, whether you are making a video interview or a short film, make sure that your actors practice and get into character.
Image composition, rules of thirds, shots, framing,... We explain you all these technical terms in the following article.
2. The scale of the plans
First, the shot is a micro sequence that "sets the scene" for the viewers. This shot will include the elements that need to be highlighted, it will allow a better understanding of the scene that follows.
The director must master the scale of the shots in order to give proportion and measured size to the characters in relation to the frame.
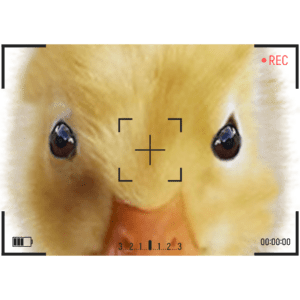
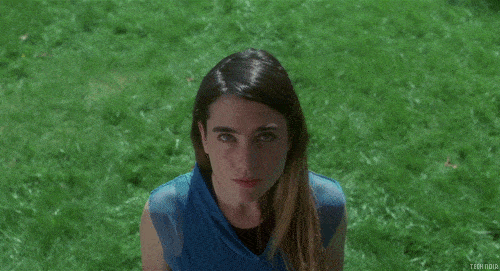
#1 The very close-up - TGP-
The very close-up will generally focus on a specific part of the face for example, to give intensity to the scene.
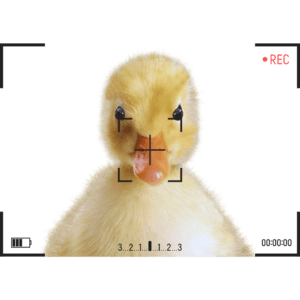
#2 The Close-Up - GP-
The close-up will be used to focus the interest on an object or here, a face. With the close-up we can see the background of the scene, but it is difficult, even impossible, to locate the action.
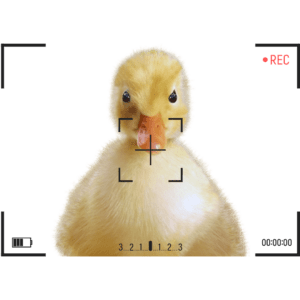
#3 The chest plane -PP-
The chest shot gives a progressively more global view of the scene. Again, you don't want to cut just anywhere. The ideal place is just below the chest.
#4 The close-up -PR-.
The close-up is the last shot that still allows enough of the setting to be seen to introduce an action without losing the viewer. In this type of shot the character is cut off at waist height.
#5 The American Plan -PA-
In the American shot, be careful not to cut a person at knee height, just above is a better option for a better rendering. This shot size allows for more gestures. If the character has to make large gestures, this type of shot should be preferred. The name of this shot comes from Western movies, it just lets the gun appear!
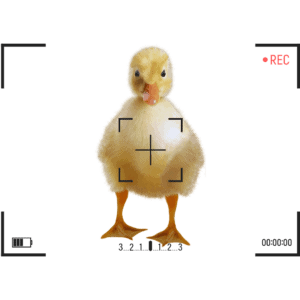
#6 The medium plane -PM-
The medium shot frames the character in his entirety. The viewer thus has a complete vision of the person in question.
#7 The general plan -PE- or general plan -PG-
The long shot, also called the general shot, sets the context and establishes the overall mood. It is usually one of the first shots used because it allows for an easier understanding of the scene.
3. The angle of the shot
The angle of view designates the orientation of the camera on a vertical plane. It influences the perception of the viewer.
This means that, depending on the shot, the same subject allows a different perception of the shots. It is therefore essential to choose the angle of the shot according to the desired intention.
#1 Le Frontal
In the frontal shot, the camera is placed parallel to the ground and at the eye level of the filmed subject. This shot is the most classical, it is perceived as neutral by the viewer.
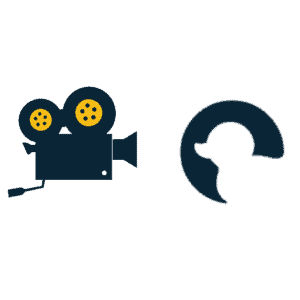
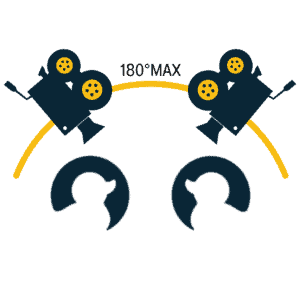
#2 The Field-Counterfact
The field and cross-field is mainly used during a dialogue between two characters. The objective is to make the viewer believe that they were exactly face to face during the exchange. To do this, it is mainly the position and angle of the cameras that matters. This technique applies the law of 180°. It allows a clearer understanding of the scene and is, therefore, used a lot in cinema. To realize a field and cross-field, the cameras must be placed at 180° on an "imaginary" line around the characters.
Be careful, if you want to use this technique on a single character, for example in a interview and in order to energize the whole, it will be necessary to respect the law of 30°!
#3 Diving
In the plunge mode, the camera is directed towards the ground and films the subject from above. The degree of dive can vary depending on the desired effect.
For example, if you want to show a fight scene in its entirety so that the viewer can measure the immensity of the chaos, it is possible to place the camera completely perpendicular to the ground and thus highlight the dimension of the scene before moving on to a great action scene!
Diving can obviously be used in a more subtle way, by placing the camera slightly above the subject. This shot tends to narrow the subject and the depth of the general shot. The viewer is then in a position of dominance. This shot can be used to give an impression of inferiority, pain or compassion.
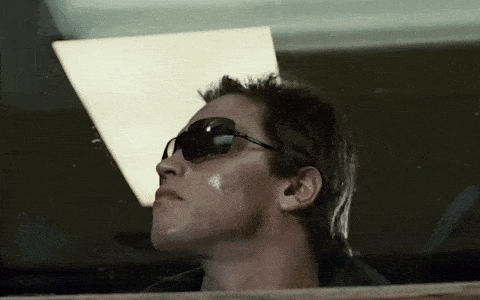
#4 The low angle
In the counter dive, as its name indicates, the camera will be oriented upwards and film the subject from below. Unlike the dive, this shot gives an impression of dominance to the subject and will tend to make it bigger.
As in all areas, variation is key, however be careful not to overdo it. It is important to vary the shots every x seconds but not necessarily the shot.
We would not touch a new concept there? The use of cutaways!
4. Cutting plans, b-roll
The viewer gets bored quickly, which means that a scene must have several short shots. A video of several minutes can't stay static, but making counter-functions every 30 seconds gives the spin. You will have understood, a dynamic video requires at least two angles of view, the goal being to multiply the frontal shots for example.
Cutaways also refer to scenes filmed at other times or from another angle. These scenes will accompany the intention of the video. As you can see, they are used to make a video more dynamic, they are very useful in interviews or during a so-called "still" shot.
5. The movements and displacements of the camera
#1 Camera movement
The camera movement accompanies the gesture or the intention of the subject. The objective is to emphasize the action or a precise element in it.
#2 Camera movement
Here the audience moves towards the subject. For an optimal result, the most important thing is to synchronize the movement exactly with the individual or subject concerned.
In more rhythmic shots, such as in an action scene, the camera can play a more important role than that of an "accompanist", it can set the tone of the scene depending on the way the film is shot, it will then take on a real role as an actor in the film.
Let's discover three well-known movement techniques, the panorama, the zoom and the tracking. Note that it is of course possible to combine the techniques in order to obtain a particular result.
The panorama will respect the natural direction of the gaze and maintain its fixed position. A PAN shot will film from left to right while a TILT shot will film from top to bottom.
The zoom will modify the angle of field in a completely artificial way. It will be used to accentuate an emotion or a scene. It can have a variable speed, a very fast zoom will give a shock effect, called the "crash zoom".
The dolly induces a camera movement and will respect the natural direction of the scene, which allows the viewer to immerse himself in it.
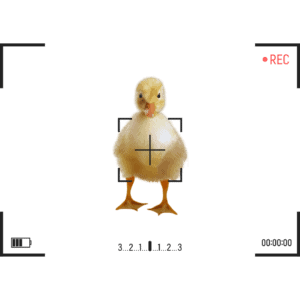
6. What is the rule of thirds?
If you are a photographer, we touch on a concept you already know, the rule of thirds!
This rule consists in framing the subjects according to the specific areas where the eye naturally comes to rest. Visually the rule of thirds cuts the image into 3 vertical and 3 horizontal parts. These lines create crossings and these represent the areas that the eye first scans.
As you can see, you should not systematically center the subject but rather place it at the points of intersection.
You may not be going into film right away, but these tips will help you approach the "more traditional" video in a more professional way. So you can apply these techniques to your interview videos, Youtube, your Tiktok, Reels Instagram, or your internal communication par exemple !
Vous voulez plus d’informations? La Duck team a trouvé un livre qui vous explique tout “The videographer's survival manual".